Feeds:
Posts
Comments


A low fat, non-dairy break from oil and vinegar. Use on salad or to dip veggies. All amounts are approximate. Adjust for taste. 

Put the following in a multi-speed blender:

1/2 pkg (about 10 oz) soft (but not silken) tofu, cut into 1″ chunks

1/4 cup coconut (or soy) creamer

1/2 cup parsley (no stems)

About 1/3 cup fresh chives, roughly chopped

1-2 cloves garlic, chopped

1 scallion, trimmed and chopped into small pieces 

A few fresh basil leaves (or dill)

1 t spice blend (Trader Joes 21 season salute) or onion powder

1/2 – 1 t sea salt, pepper to taste

1 T olive oil

1 T cider vinegar 

Blend on low speed increasing to medium-high speed.  Add coconut (or soy) milk until desired thickness. 

Taste and adjust seasoning and herbs. Garlic will become stronger over time. 

Store in refrigerator. Makes about 2 cups. 

20140418-133931.jpg

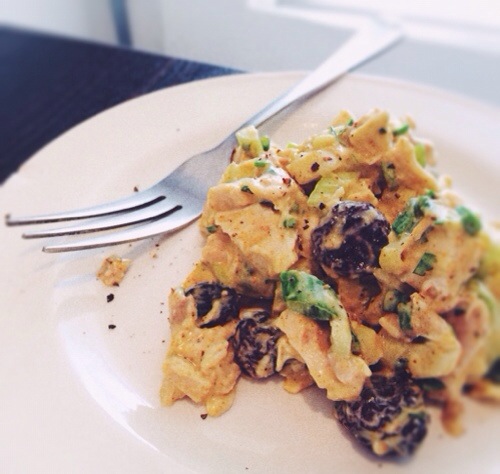
Everyone here is allergic to chicken eggs and/or cow dairy, so this recipe uses goat yogurt as a dressing base. This recipe is kind of a no-brainer; no surprises. Nothing unusual.

1/2 cut up roast chicken (from the night before, here)
2 large scallions, slit once lengthwise and chopped thinly
2 stalks celery, slit a few times lengthwise and chopped
Handful of chopped greens. I used Italian parsley– you could use baby kale, beet greens, etc.
1/2 cup + roughly chopped raw cashews
1/2 cup dried cherries (or raisins, currants, chopped dried figs…)

For the dressing:
About 1 cup goats milk yogurt
About 1 T curry powder (I used Maharaja)
1/2 t stevia (or 1 T agave syrup or equivalent sweetener. Or not)
Salt and pepper to taste. With the curry you don’t need as much salt, I’ve found.
Adjust seasoning

This would also be good with 1/2 cup chickpeas added (rinse well if canned). You could even make it with chickpeas and/or beans instead of chicken.

Use soon and refrigerate. I’ve found that when I use yogurt for salads like this that it separates and gets kind of watery.

Butternut squash soup

20131113-115312.jpg

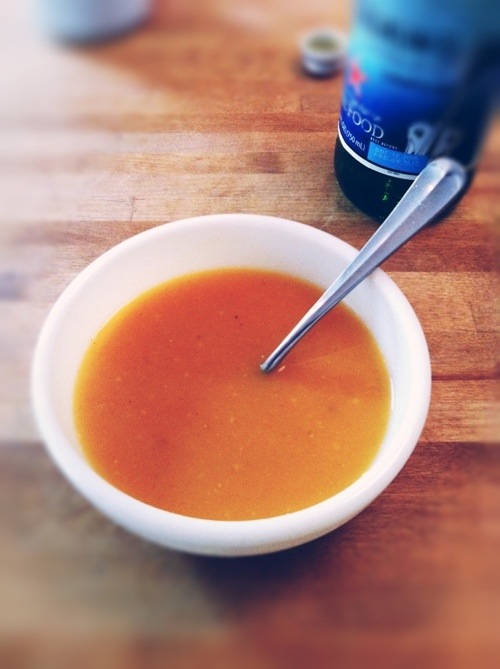
Fall ushers in soup time. The house is cool enough that I can leave a pot of chicken stock on the back of the stove overnight, and winter squash and root veggies are everywhere and make hearty, warming meals.

I made this butternut squash soup for lunch. Butternut squash soup is perhaps the most ubiquitous winter vegetable soup and is so easy to make.

I cut about three inches off the small end of a butternut squash and chopped it into 1″ cubes. In a saucepan I covered them with water and boiled until tender. I drained some (but not all) of the water and added homemade chicken stock– ladled right out of the pot (about 1 1/2 cups). After throwing in a large clove of garlic, salt, pepper, about 1/2 t each of ancho chile powder and paprika, and 1/4 t cumin, I blended it until it was fairly smooth. It’s better to start with less liquid and add after blending so you get a consistency that appeals to you.

When served you can add chopped parsley or cilantro and avocado…

Pesto

20130810-075929.jpg

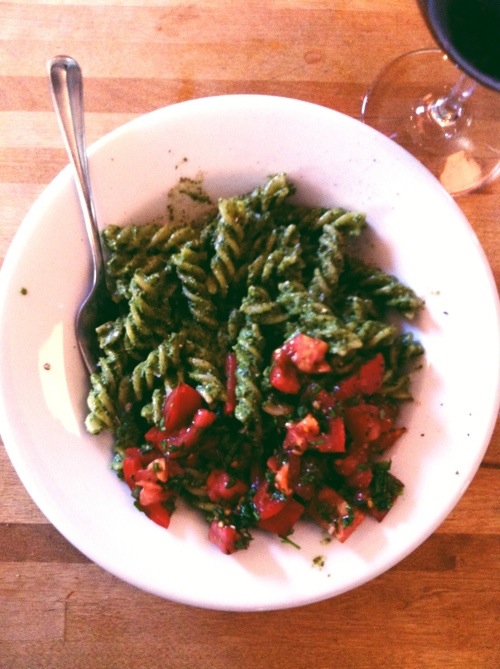
I made this pesto for my daughter and her vegan friend. My daughter often is not fond of pesto because of the strong basil taste. This recipe incorporates spinach, which makes the flavor much more mild and eliminates the need for a side salad or veggie. I had mine with macerated tomatoes on the side (diced tomatoes, minced garlic, olive oil, balsamic vinegar, salt, chopped basil and Italian parsley– combine and let sit for an hour or more).

Pesto
In a food processor, combine (amounts are approximate– adjust for your taste– I added a little extra basil when I made it again for myself):

1 (packed) cup basil leaves, rinsed
2 (packed) cups baby spinach, large stems removed if you’re ambitious, rinsed (don’t worry about residual water)
3 cloves of garlic
1 t sea salt
1/3 cup lightly toasted pine nuts, cooled
1/3 cup raw walnuts (adjust nuts to your taste– I like a lot. The walnuts add good protein)
Olive oil until the pesto is combined and soft– approx 1/3-1/2 cup. I like a lot of olive oil– it makes the pesto creamy and soft.
If you like, add a couple 1″ cubes of Reggiano cheese.
Blend until creamy. Combine with cooked pasta– something that hold the pesto well. Serve with macerated tomatoes and red wine (water for the kiddies).

Cauliflower Soup

20121127-202440.jpg

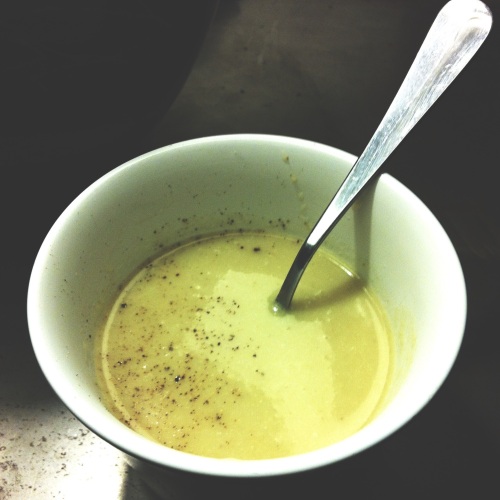
If you’re like me, you have at least a gallon of turkey stock on the back of the stove from the thanksgiving bird. I love making soup after the holidays, the simplicity is restorative somehow.

I boiled (in water) about a half of a head of cauliflower (you could use romanesco) and most of a leek, cut into smallish pieces. When it was all tender, I drained the water and added turkey stock, a little half and half (less than1/4 cup), about a 1/4 t of curry powder, some fresh ground nutmeg, and salt and pepper. I blended it with the hand blender. So easy.

Banana- nut bread

This is a really great banana bread recipe from Nancy Silverton’s pastry book from La Brea Bakery. It’s really moist and flavorful. I substituted black walnuts for the pecans, and only toasted the regular walnuts. Black walnuts can be difficult to find but are well worth tracking down. If you’re from New England, you will recognize them as what makes that delightful and intoxicating turpentine- like smell when you run over them in the rain.

2/3 cup walnuts
2/3 cup pecans (or black walnuts)
4 bananas, mashed (Nancy has you mashing 3 to make 1 1/4 cups and using one whole banana for garnish. We made a half- recipe with 2 bananas and used them all mashed in the bread.
2 extra- large eggs
1 1/2 t pure vanilla extract
1 stick butter, chilled and cut into small cubes
1 1/4 t baking soda
2 1/2 t baking powder
3/4 t kosher salt (i used sea salt)
1 t cinnamon
3/4 t freshly ground nutmeg
scant 1/4 t ground cloves
1 T poppy seeds (we used 1 T for our half- recipe. We love poppy seeds)
1/2 cup granulated sugar (we used coconut palm sugar, normally used in place of brown sugar but has no molasses flavor, so…)
1/4 cup plus 2 T light brown sugar, lightly packed
1 1/2 cups unbleached, all purpose flour

Preheat oven to 325 and toast the nuts until lightly brown (if you use black walnuts in place of the pecans, only toast the traditional, English walnuts), about 8-10 minutes. Cool, chop coarsely, set aside. Turn oven up to 350.

Whisk banana puree, eggs, and vanilla in a bowl. In the bowl of an electric mixer fitted with the paddle attachment, cream the butter, baking soda, baking powder, salt, cinnamon, nutmeg, cloves, and poppy seeds. mix on med-low until softened. Add sugars and turn up speed to medium high and beat until fluffy, about 3-4 minutes, scraping sides as necessary. Add the flour and banana mixture in parts starting with the flour, mixing enough to just combine. Remove paddle and mix in nuts by hand. Pour into prepared loaf pan (I greased liberally with coconut oil and then floured). If you saved the 4th banana, cut 2, 1/4″ strips from the banana, lengthwise. Place on top, slightly interlocking the arcs. Sprinkle with a little sugar. Bake for 50-60 minutes. We did a half recipe, which turned out to be about 40 minutes. Test with skewer, it should be not gooey. Don’t over bake!

Allow to cool in pan slightly, then turn out onto cooling rack. SLice and eat with butter, immediately.

So, I was curious about the pre-cooked, frozen langostino tails at Trader Joes. It was about 90 degrees today and I really didn’t want to turn on the stove. I put the frozen tails (about 1 lb.)  into cold, brined water [about 2 T sea salt to a half- gallon of water– I don’t measure]. They’re small, they thaw quickly in about 20 minutes. I drained them and added the juice of about three limes, 2 T very thinly sliced onion, cherry tomatoes (halved), a pinch of epazote, oregano, cumin [tiny amount,] dried chile guajillo moido, salt, chopped cilantro, about 2 T of mezcal, and half a seedless cucumber, peeled and diced. I let it sit in the fridge for a couple of hours, then added a diced avocado.

I served it with a thick avocado/chile salsa/sauce on top:
1 pasilla chile, grilled, peeled, and cored
6 medium tomatillos. paper removed, grilled well, skins removed
1 avocado
juice of 1 to 2 limes
salt
2 T cilantro

Put all ingredients in a foor processor and puree until desired smoothness.

It would be great with some homemade corn tortillas, shredded lettuce, and a huge margarita…

Chile Relleno Casserole

This was one of my favorite dishes growing up. I should have just asked my mother for the recipe, but instead tried to figure it out myself. Really, the invention is the source of my joy in cooking. So I looked at some recipes online. My daughter walked in and said “you’re using a recipe?!!” and walked out in disgust. Custards are tricky, however, and a recurring source of failure for me in the kitchen.

I think I got the proportion right, but I did not put any flour into the custard, which was my downfall. It just didn’t seem right, and many of the recipes I found did not add flour. ADD FLOUR. I’m going to give you the recipe I used, with the addition of the flour, then the recipe I got from my mother. So, one that was almost a success with a fix, and another that I didn’t test but was the recipe mom used when I was a kid– the source of my love for this dish. You can choose which to use. My recipe is much smaller, as I just cook for my daughter and myself. My mom’s recipe will feed at least 6 people.


Anaheim chiles are in season now. So don’t use whole chiles in a can [ok, maybe in a pinch], fire roast your own. They are readily available even at Safeway.

My mother gave me this wonderful grill that goes right over my gas burner, just for roasting peppers. I have also roasted them under a broiler, on a gas grill, and in a pinch in the old days, on the coils of an electric stovetop [they stick a little]. I love the smell of roasting chiles. If your neighbors smell it, they may think you’re smoking pot, but it will only add mystery and intrigue to your reputation in the neighborhood.

Char the chiles on all sides until they are black [I used 6 for this recipe]. Don’t do it too quickly, you don’t want to simply burn the skin, you want to partially cook the chiles. Turn them around and rearrange them on the fire until they are all roasted evenly. Transfer them to a plastic bag and tie it closed. You can also use a paper bag, and there are possibly harmful effects of heating plastic against your food, but it makes peeling much easier. Allow them to sit and steam in the bag. When they are almost cool, and leaving the bag closed, rub the skins off the peppers with your fingers through the bag. It seems odd at first, but it makes much less mess than taking them out and doing it by hand. When they are all skinned, open the bag and wipe off the skin debris with a towel. Don’t rinse them, and don’t feel the need to remove all of the black, charred skin; it adds to the flavor. Cut off the top of the chile, make a slit down once side, and scrape out the seeds [and if you like, trim out the ribs]. You can attempt to seed them without cutting the side, keeping them in tact, but it’s hard.  Pasilla or ancho chiles that have a wider top and are shorter are easier to seed intact. These chiles are usually stuffed and fried or baked– so keeping them intact is more important.


I used 8 oz of goat’s milk Jack cheese. Half [4 oz.] I cut into 6 strips to stuff the chiles, the other half I shredded to put on top. Put a slice of cheese in each chile, fold it over, and place into a baking dish.


Make the custard: Beat together 1 1/2 cups of whole milk [I used 1 cup of lowfat milk and 1/2 cup of half and half], 3 large eggs, and a scant 1/4 cup flour [the step I regrettably omitted]. A higher fat content milk makes a better custard and one that is less likely to be watery. Add salt and pepper to taste. Pour the custard over the chiles, and sprinkle with the remaining, shredded cheese. This is not a lot of cheese, compared to other recipes, if you want to add more– go for it. Often cheddar is used in conjunction with Jack. The goat cheese was really good, perhaps a goat cheddar? I sprinkled some ancho chile powder and freshly ground black pepper on top. Bake in 350 degree oven until brown and puffy. Remove from oven and let sit for a few minutes before cutting.

My mother’s recipe is as follows [same assembly, just different amounts of ingredients]:

Use a 9: x 13″ pan.

18 chiles, seeded
1 lb. M. Jack cheese cut into 1″x3″x1/4″ strips to stuff into chiles
1/2 lb. Cheddar, grated
5 eggs
1 1/4 cup milk
1/4 cup flour
1/2 t salt; pepper to taste

White Bordal beans

I came across this bag of White Bordal Scarlet Runner beans that I had purchased in Tucson at Native Seeds Search while visiting at Christmas time. White Bordal beans [often called ‘Mortgage Lifters’ because of their large size] have a delicious flavor and meaty texture, perfect for salads or just slathering in olive oil.

They had been in my pantry for months so I was not sure if they would be very good, but they were delicious.

Like most beans, you need to soak them over night. The only beans I don’t bother soaking are dried lima beans. I find they can boil up nicely right out of the bag without adverse effects. I soaked my beans for about 10 hours; not because they needed the extra couple of hours, but because I was distracted and lazy. They nearly triple in size, so give them adequate water.

After rinsing them and giving them fresh water, I added a few cloves of garlic and a couple of bay leaves. Don’t add salt to cooking beans– it toughens their skins. That’s it. I simmered them until they were tender [skimming the surface throughout their cooking].

I drained the water and doused them with a lot of really good olive oil, salt and pepper. The heat and olive oil combined to further soften the outside skins– or so I imagined. The outsides were not as delicate and tender as they are with smaller beans, or maybe it was the extended time on my pantry shelf… but they were delicious.

I served them for dinner with grilled skirt steak and arugula/kale salad with a lemon juice and olive oil dressing. The next evening after my daughter went to sleep I warmed some up, poured on more olive oil and red Hawaiian salt, and had them with a chunk of Stilton and a glass of Beaujolais. She would have wanted me to…

Below is the link to Native Seeds Search. They are a not for profit organization that collects and grows heirloom, native seeds. Their work is amazing and their prices are ridiculously reasonable. Definitely worth your support!

http://shop.nativeseeds.org/products/fd207

Socca

I wish that I had photographed all of the steps and stages of this meal, but alas, I forgot. Again. It seems to be routine. Perhaps I just get too hungry, or distracted… whatever it is, it puts the onus on you to use your imagination and create your own visual images for the missing parts and pieces. So sorry.

So I had been wanting to make this dish. It is called different things all over the world: Socca in France,  Farinata in Italy, Karantita in Argentina, and Calentita in Gibralter. Other places have other similar dishes, but the basic ingredients are chickpea flour, water, salt, and olive oil. The mixture is let to rest, then baked in copious amounts of olive oil until brown. Sometimes cumin is added. Unable to follow even the most straight forward instructions, I added a few things and turned it into an experiment…


I took 1 cup of fresh (canned) chickpeas (Garbanzo beans) and processed them with some salt and a clove of garlic. I made this twice, the first time adding the fresh chickpeas and the chickpea flour together in the food processor. The second time I added the ground chickpeas and garlic to the batter already prepared. I preferred the texture of the latter. Combine 2 cups of chickpea flour with water. Start with about 1 cup and add until it’s a thick batter. The first time I made it thicker, and I was forced to spread it in the pan, which was difficult. I advise adding water until it is thick but pourable. Add about 1/2 teaspoon of salt (more if you like), and 1/4 t cumin (if you like). Add the ground chickpeas and garlic and about 1/4 cup olive oil. Let stand in the refrigerator for at least 2 hours, preferably 4.

It was about 100 degrees outside, so I decided to make it on the grill in an iron skillet. Many people cook it under the broiler or in a hot (450 degree) oven. The grill is nice because with the lid down it creates a very hot oven environment and surface heat.

Right before I cooked the socca I added about 1t of baking powder. As far as I can tell no one else advocates this, but I think it made it a tad lighter. I heated up the grill well, then put two iron skillets right on the grill. When they were hot I added a lot of olive oil– probably about 1/4 cup to each. When the oil was hot I poured in the batter, swirled it around to make it even, then shut the lid. After about 5 minutes I flipped the socca with a large spatula (don’t time it, make sure it’s nice and well browned). The socca in the larger skillet fell apart (I just flipped over the pieces– it tasted just as good, ya know). I let it brown on the other side then took it off the grill.

I cut it in wedges and served it with eggplant that I had previously sliced, salted, rinsed, oiled, and grilled, and red peppers I had blackened over a flame, let steam in a brown bag, then cored, peeled, and cut into strips. I salted both and poured on more olive oil and some chopped parsley.

I served the socca with the eggplant, peppers, toasted pine nuts, crumbled goat cheese, and an arugula salad (sorry, no photo evidence). I think it was a success and my 9 year old loved it. It’s gluten- free, wheat- free, and has a high amount of plant protein. Paired with the veggies and all the olive oil– healthy!